Note: Please Disconnect the webdav connection when you finish your work, as the webdav session expires after eight hours.
(Leaving a webdav connection open poses a security risk.)
After that time is up, if you have NOT disconnected, you will be prompted to re-authorize via 2FA, repeatedly, until you respond.
If you do not respond, your duo account will get locked.
A possible other option is to use the 24-hour-valid “JWT”. To get one go here
Note: We have discovered an issue with Cyberduck version 6.9.4 accessing Web Hosting folders/files. If you have this issue, try version 6.9.3 or Mountain Duck.
Cyberduck
Cyberduck Quick Reference Guide
Download Cyberduck
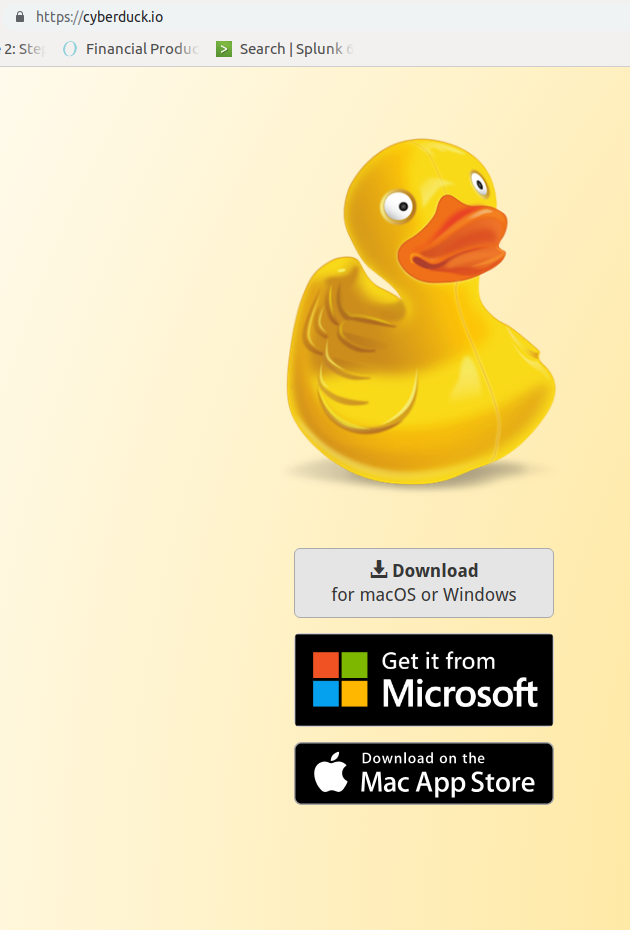
Go to the Cyberduck Web page.
On the left side of the page, click the Download for macOS or Windows button.
On the next page, click the Download Cyberduck for MAC
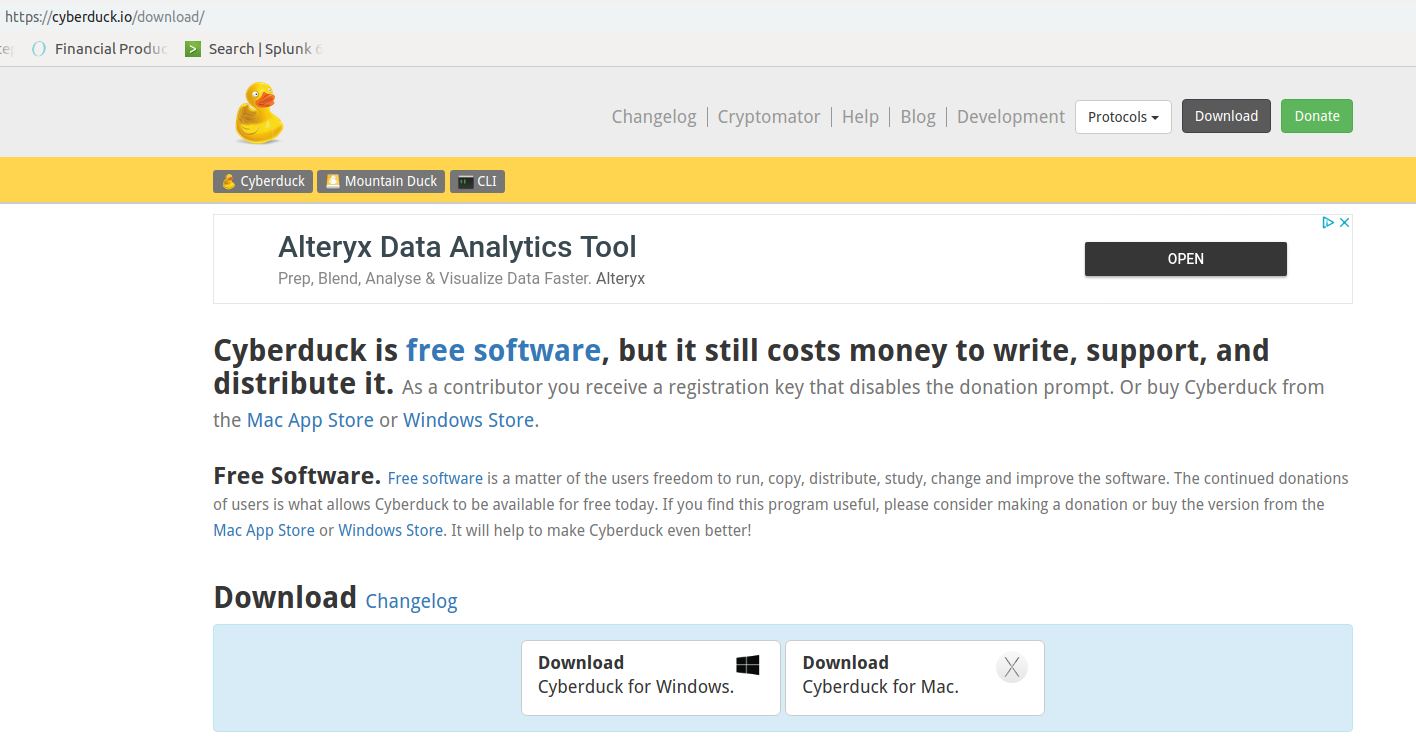
Save the file to your computer.
Install/Run Cyberduck
When the download is complete, in Finder, double-click the icon of the file that you just downloaded.
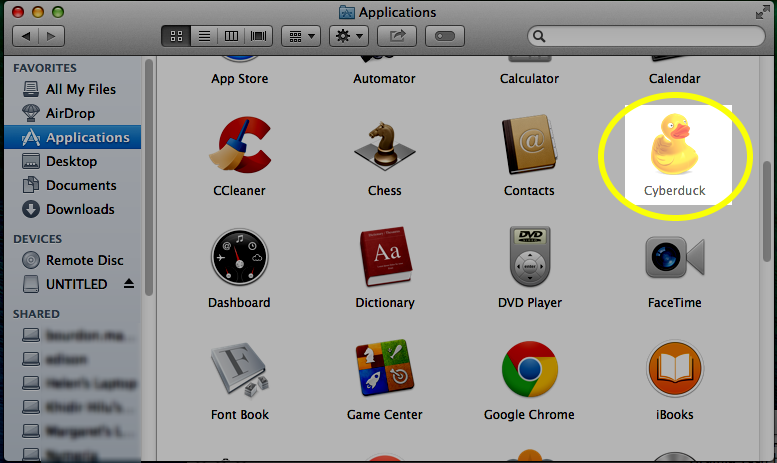
To add Cyberduck to Applications, drag the Cyberduck icon (from either the downloads folder or the finder window) to the Applications icon in the left menu pane.
To launch Cyberduck, go to the Applications window, and double-click the Cyberduck icon.
– or –
Go to your downloads folder and double click the Cyberduck icon to initiate the installation process.
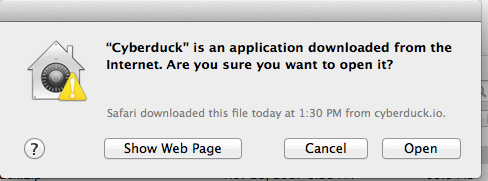
If prompted about installation of an application from the Internet, click the Open button.
Create A Connection/Bookmark
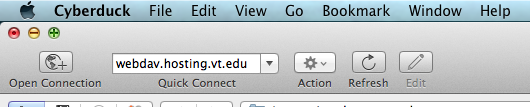
Click on Open Connection in the upper left hand of the Cyberduck menu
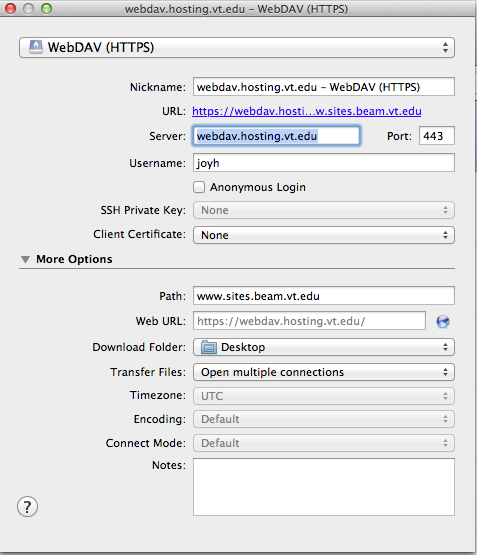
Fill out the WebDAV form with the appropriate webdav string, your PID (not alias) and Password
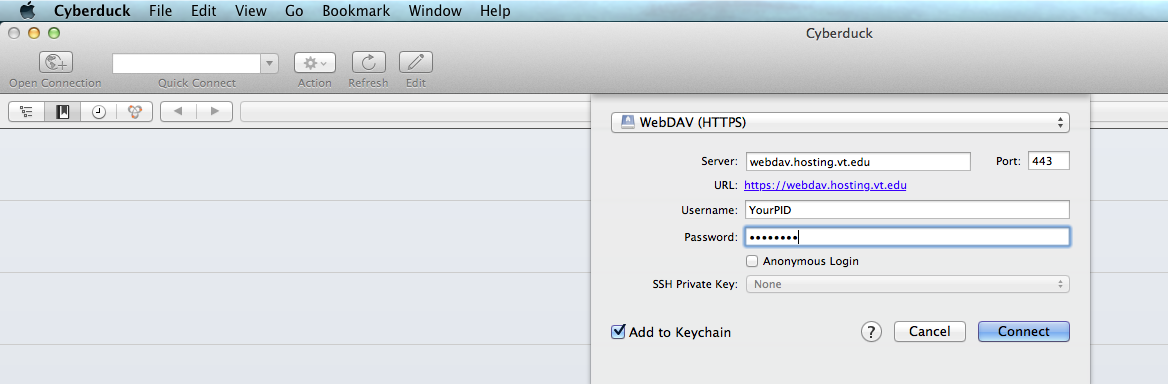
For departmental Web sites, type: webdav.hosting.vt.edu
For student organization Web sites, type: webdav.org.vt.edu
In the Username text box,type your PID (not alias), which is the first part of your @vt.edu email address.
In the Password text box, type your PID password.
(If you choose to use the 24 hour JWT, copy and paste it in the password text box.)
(If you have forgotten your password, follow the instructions at Forgot PID Password.) )
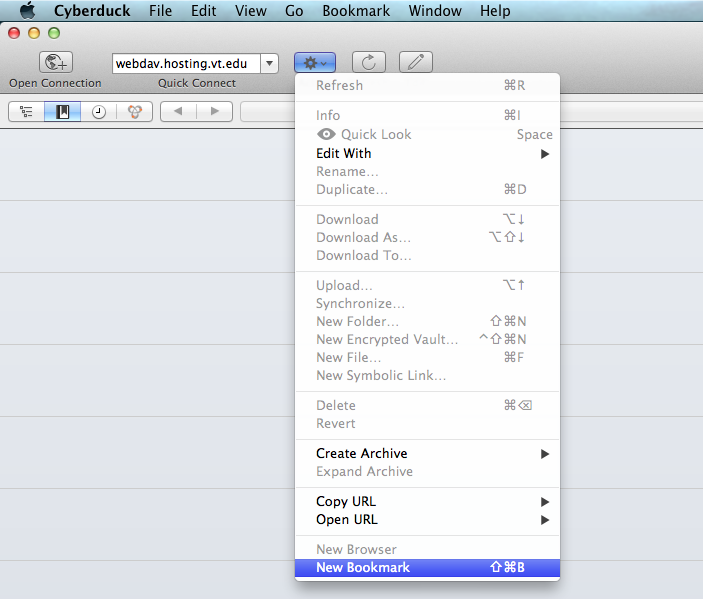
Click on Action (wheel) icon to the right of the Quick Connect text box of the Cyberduck menu
Choose New Bookmark
For “server” fill in webdav string,
For Departments: webdav.hosting.vt.edu or For Organizations: webdav.org.vt.edu
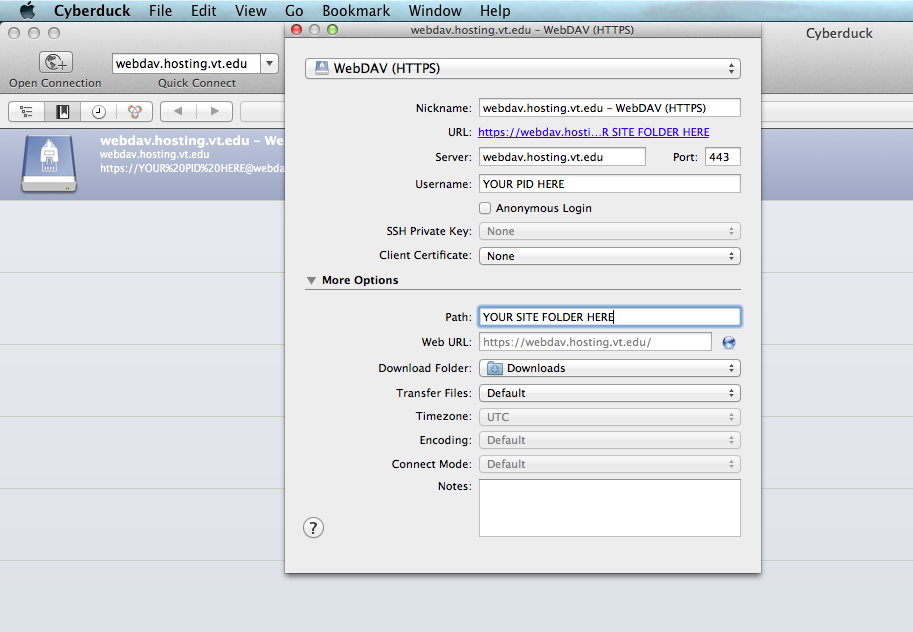
and under More Options fill in site name for “path”.
For example: www.ABC.vt.edu or www.ABC.org.vt.edu
Connect to the Server
Right Click the appropriate bookmark and Choose Connect To Server.

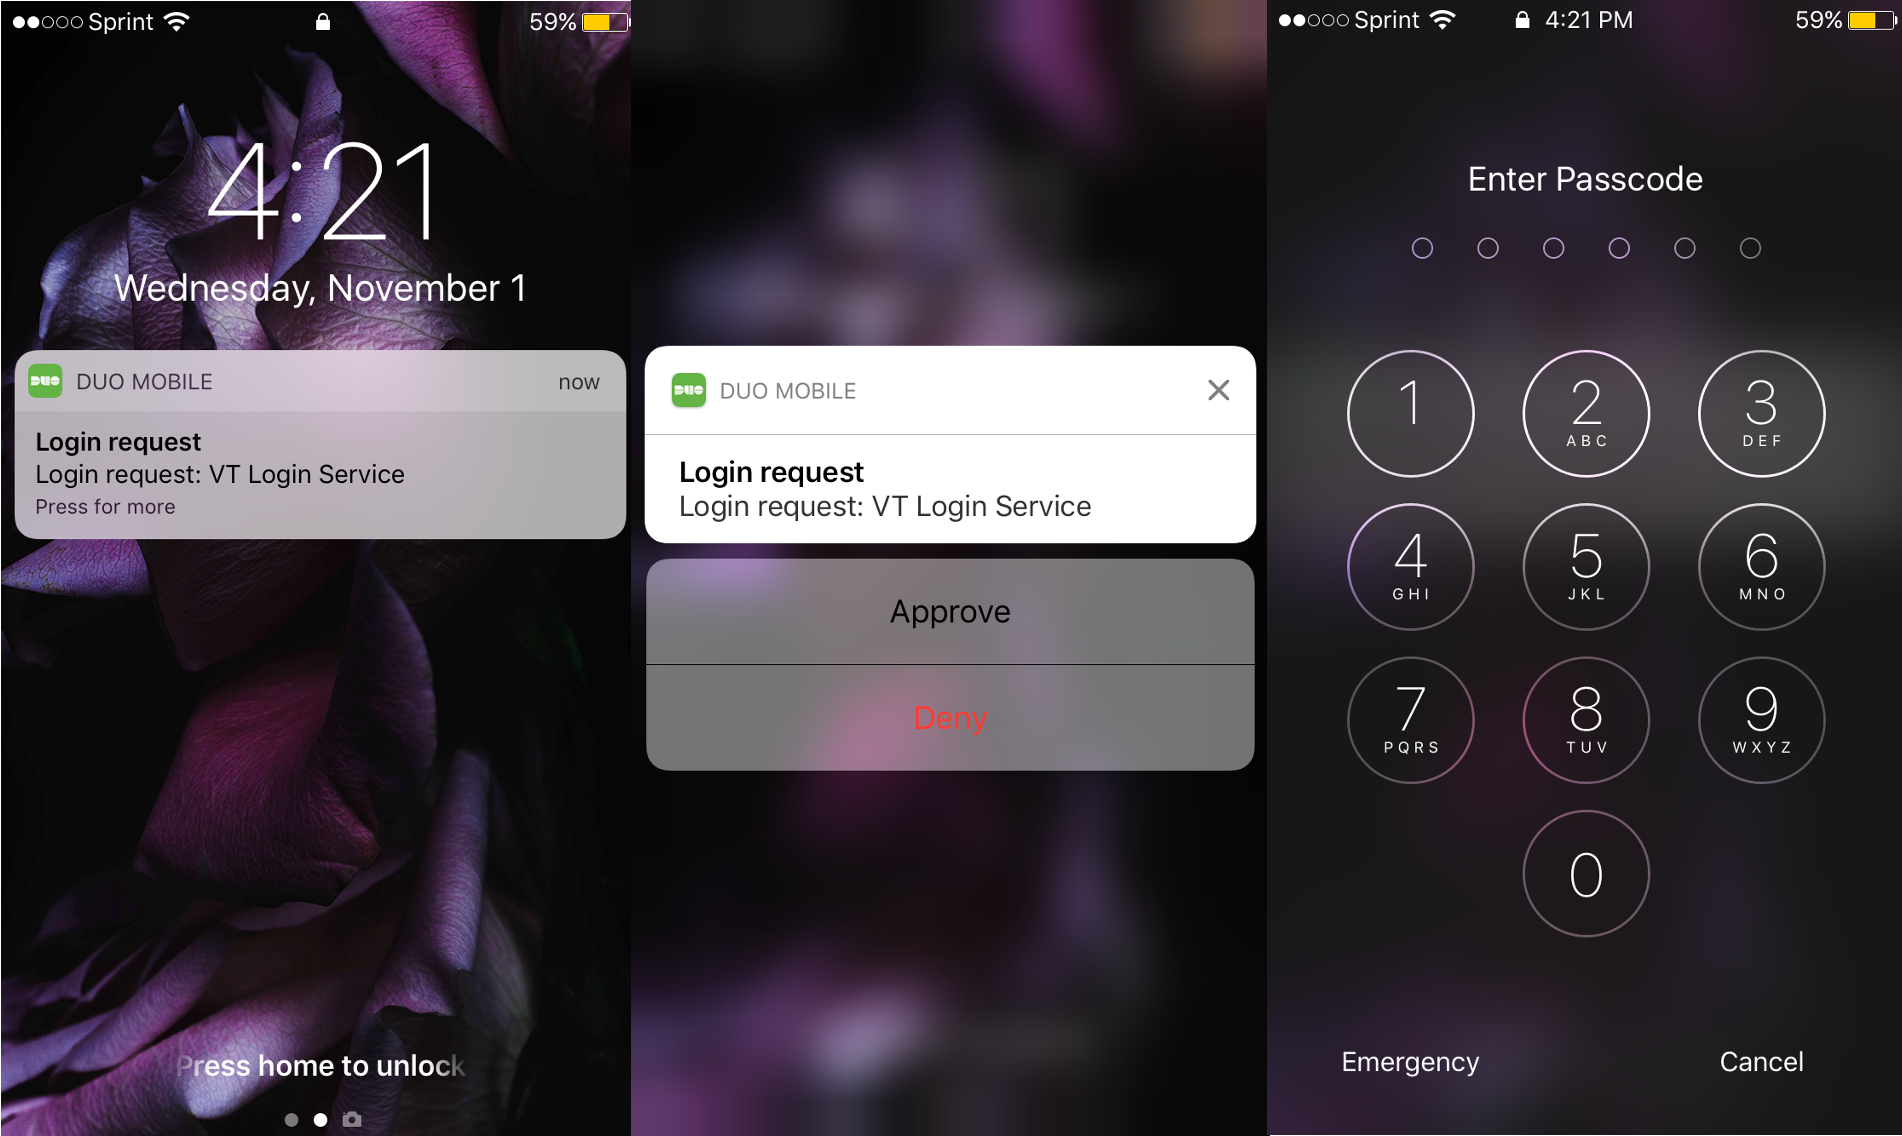
Two-Factor Authorization will occur via your default method of 2FA
If your default method is phone, you must answer your phone and follow the directions
If your default method is push, you will be prompted to authorize via the Duo AppThere are three possible ways you will be asked to give your approval for 2fa:
Phone is locked
If your phone is locked, a popup will show (left in image below), press on “Login Request”
Press “Approve” (or Deny) (middle image below).
After pressing “Approval” you will be prompted for your passcode/fingerprint/login for your phone (last image below
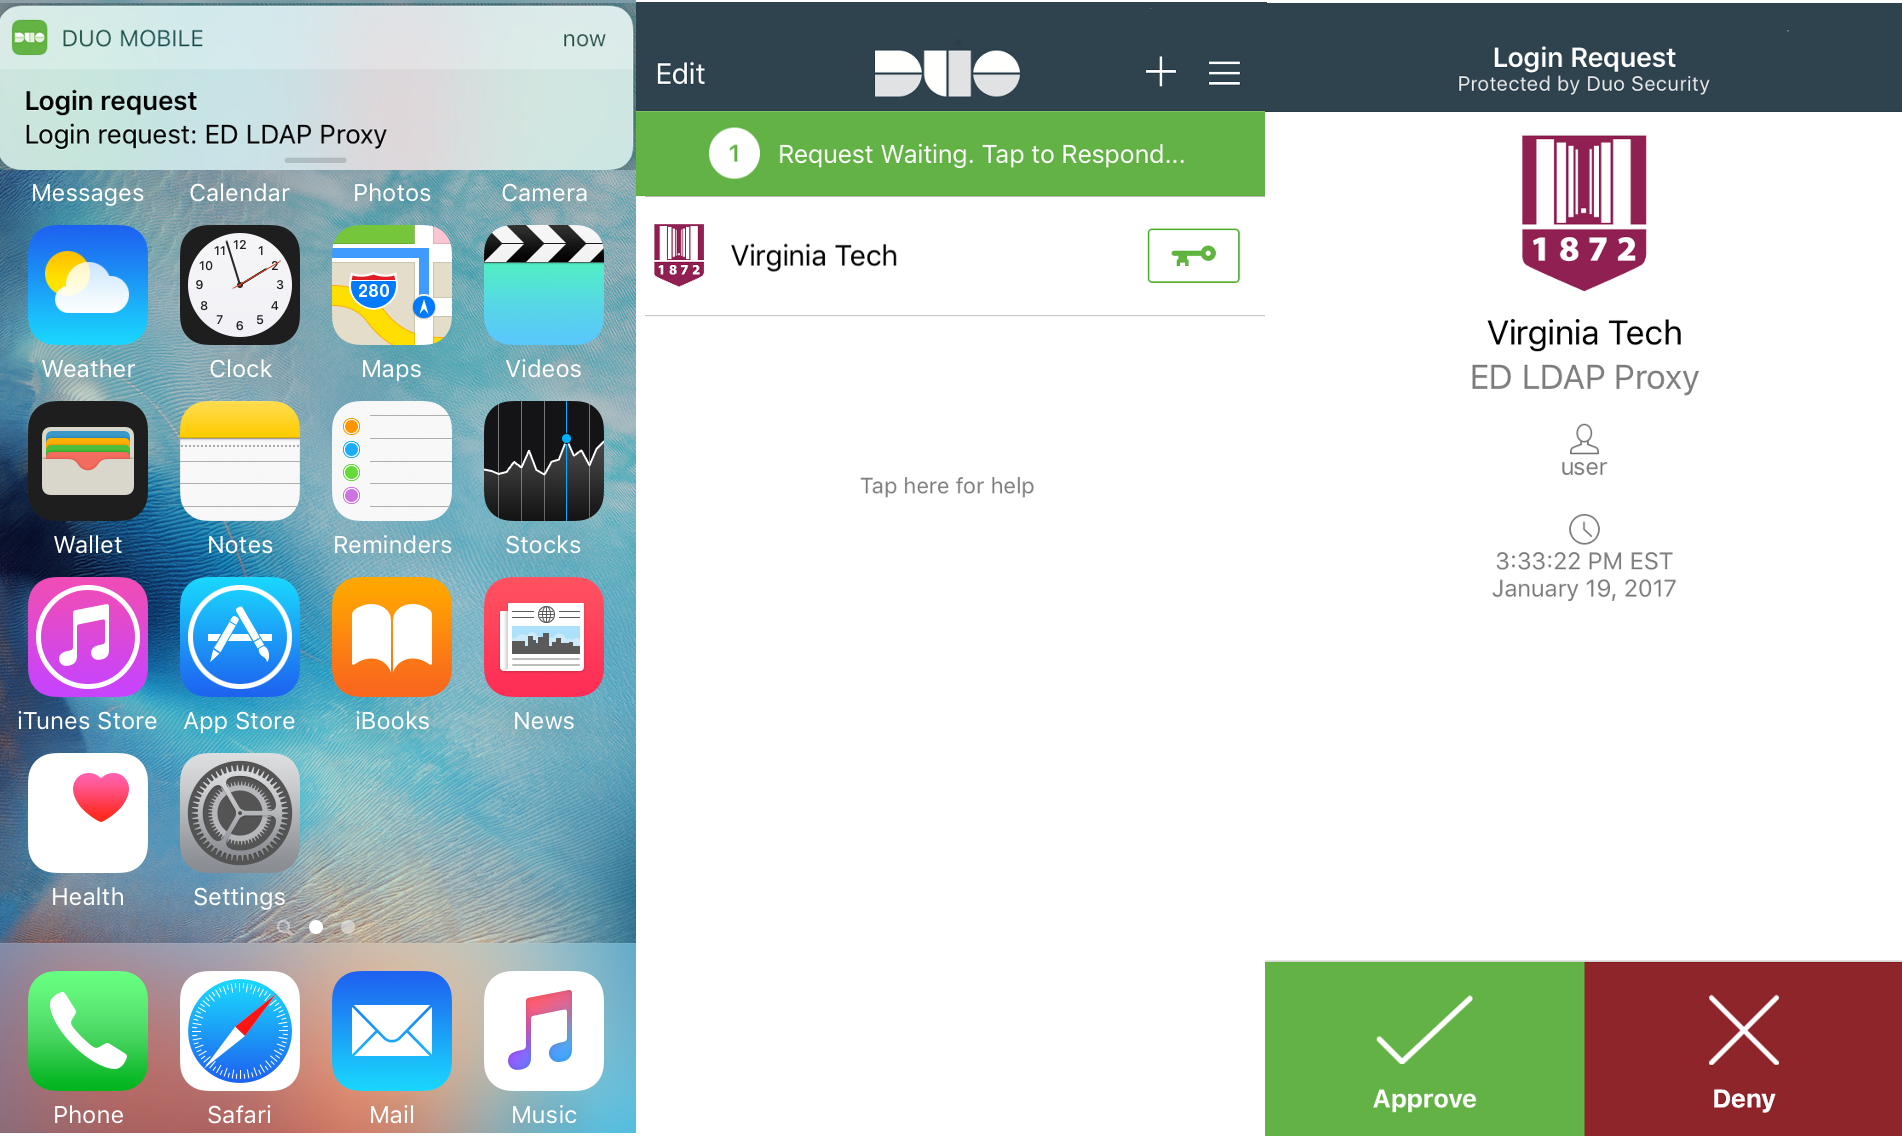
Phone is UN-locked
If your phone is un-locked, a popup will show (left in image below),
Open the duo app (middle image below).
After pressing “Request Waiting. Tap to Respond…” you will be prompted to “Approve” again. (last image below)
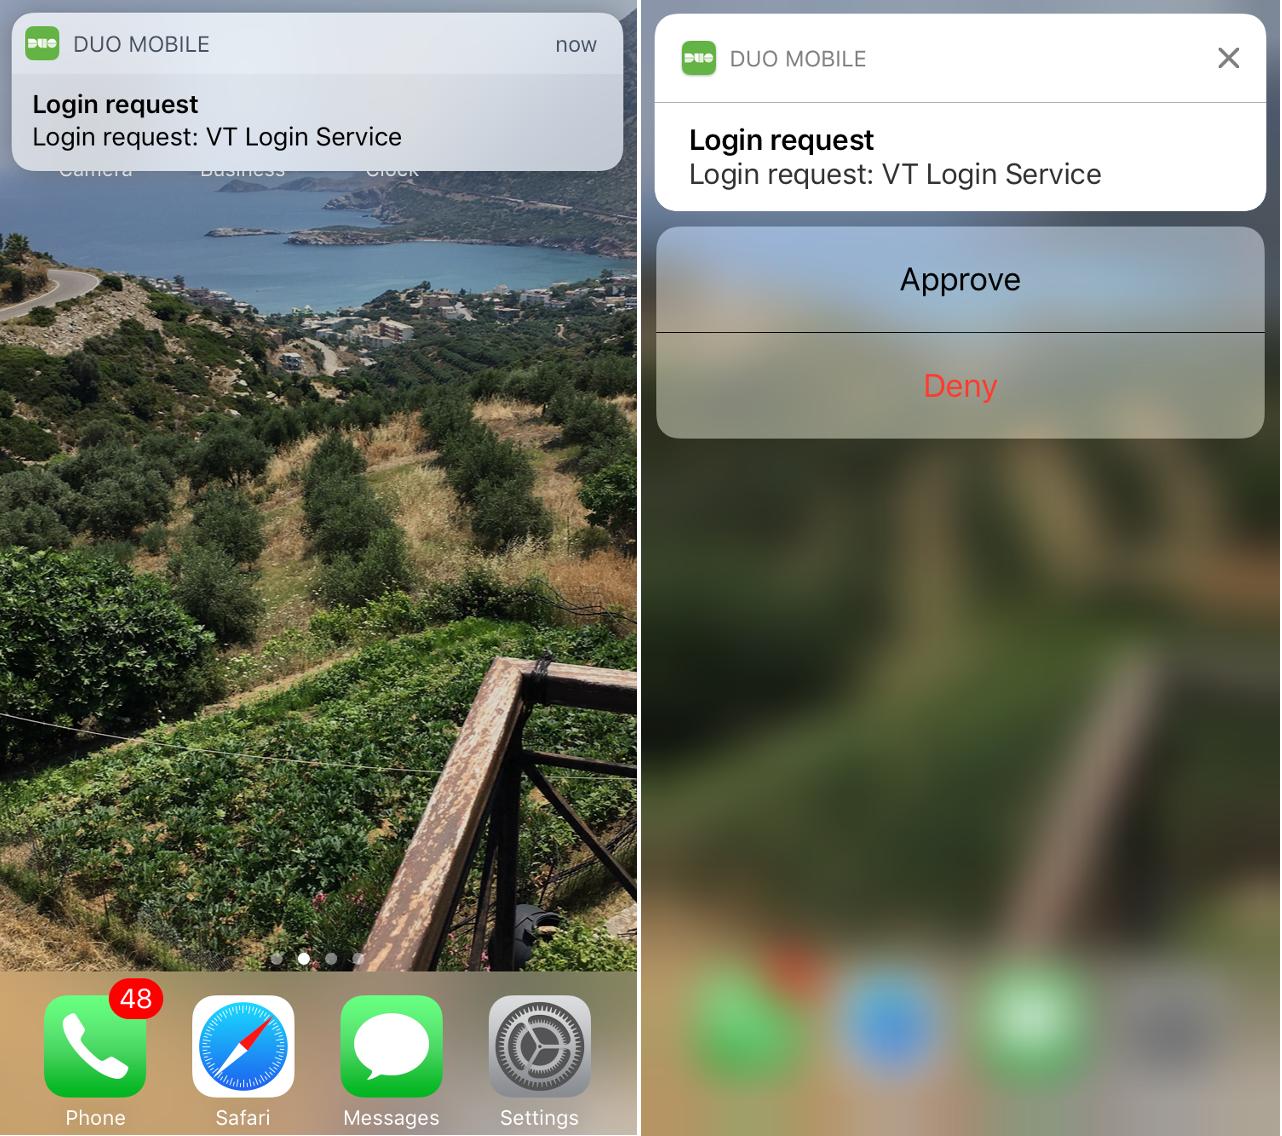
Phone is UN-locked
If your phone is un-locked, a popup will show (left in image below), press on that “Login Request”,
Choose “Approve” (or Deny) (right image below).
Another window will pop up showing all folders and files in the site.
Previous Bookmarks
If this is a re-installation of Cyberduck, you may have previous bookmarks/connections stored, and will see them upon opening Cyberduck
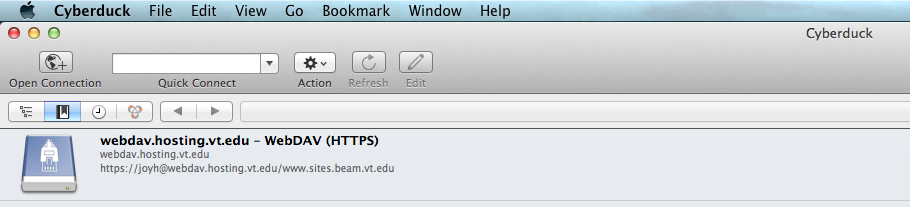
Right Click the blue icon /bookmark /connection and choose “Edit Bookmark” to review/edit webdav settings

Review your webdav settings
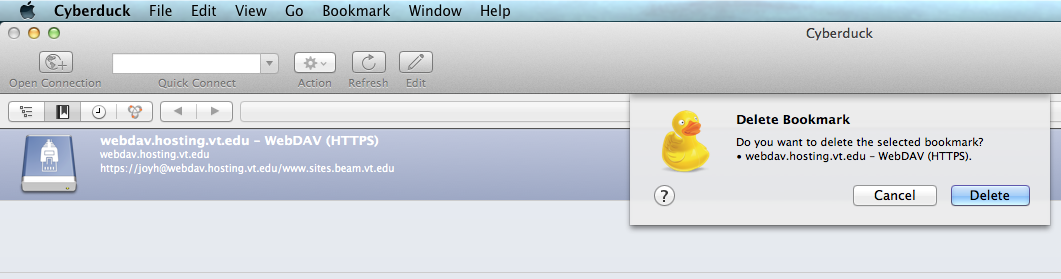
Delete a Bookmark
Right click the appropriate bookmark, and choose Delete Bookmark
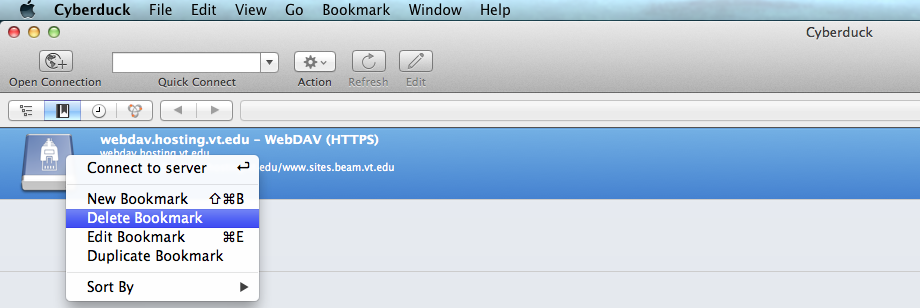
Click Delete